Document Importing with Metadata
Important: The Document Import with Metadata add-on is included with in your Policy & Procedure Management license, but it is not enabled by default. To enable it, contact NAVEX Customer Support by submitting a request in the Community.
Complete this task to import documents containing metadata.
Important: This feature is typically used as part of your Policy & Procedure Management implementation. Be sure to contact NAVEX Customer Support by submitting a request in the Community for assistance when importing data with metadata.
When you prepare the document metadata spreadsheet, you must assign certain entities, such as owners and templates. These entities must already exist in Policy & Procedure Management for a metadata import to be successful.
Of the Policy & Procedure Management entities that can be assigned using the metadata spreadsheet, some are required and some are optional. You must configure at least the required entities prior to a document import with metadata.
| Required Entities | Optional Entities |
| Templates |
Proxy Authors |
| Document Owners | Categories |
| Sites |
Languages |
| Departments | Reference Number |
Important: The Import Documents with Metadata feature is for importing new documents only. Do not use this feature to update the metadata of existing documents.
- Click Settings & Tools > Content Setup, and then click Import Documents.
- Click the Import Documents with Metadata tab.
- To select files to upload, in the Step 1: area, do either of the following:
- Click Browse. Find and select files, click Open, and then click Upload.
- In Windows Explorer, find and select some files you want to upload, drag them over the file list area of the Import Documents window in Policy & Procedure Management, and then, when you see the area highlighted in green, drop the files.
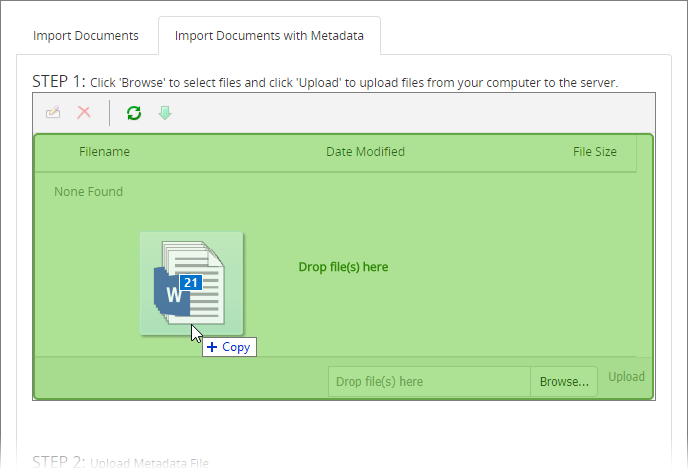
Note: You can use a .zip file containing all of the documents you want to upload.
- To download the metadata spreadsheet template, in the Upload Metadata File area, click Generate Metadata File, and then open the file.
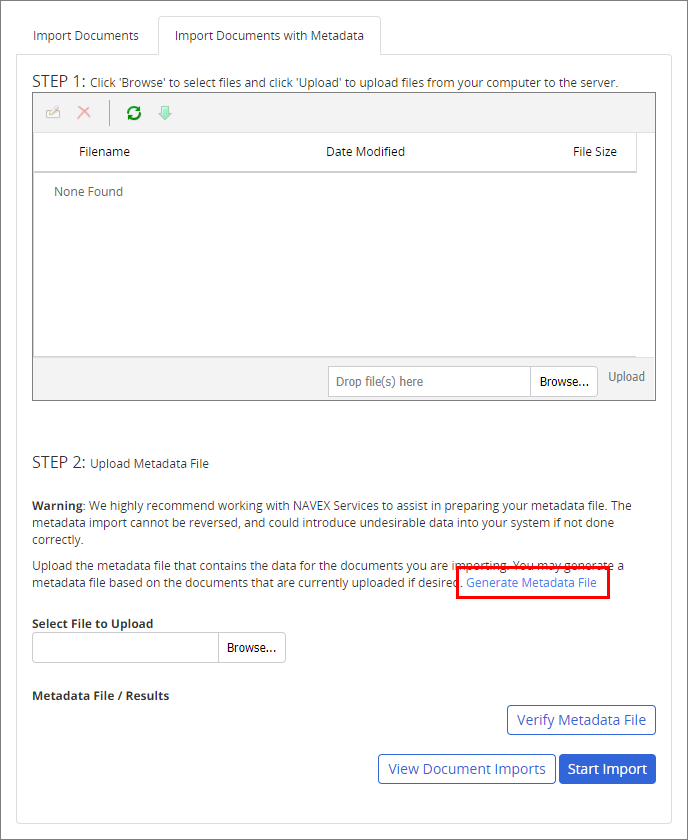
The Excel template will contain the names of the files you uploaded previously.

- Enable editing in the Excel file.
- Using the field descriptions as a guide, fill in at least the required information for each document. Fields are case sensitive and may require special formatting. Fields labeled Optional can be left blank and fields labeled For System Use Only must be left blank.
- Save and close the spreadsheet.
- In the Upload Metadata File area, click Browse. Find and click the metadata spreadsheet you prepared, and then click Open. The name of the uploaded file appears under Metadata File / Results.

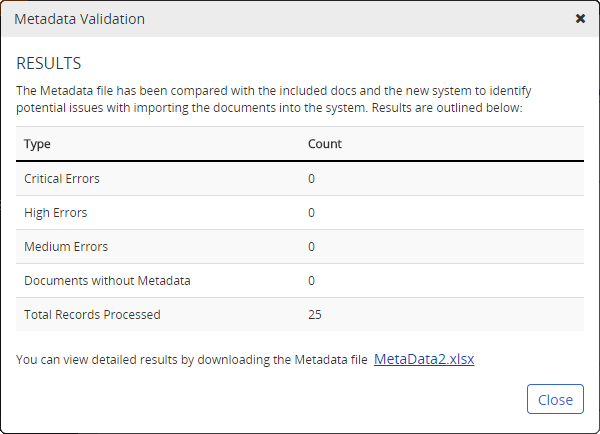
- Make sure that the metadata spreadsheet is closed in Excel, and then click Verify Metadata File.
The results are shown in a table like the one below.
- Depending on the results, do one of the following:
- If there are no errors, click Close and then continue to "Starting the Import" below.
- If errors exist, click the file name to open a read-only copy of the metadata spreadsheet containing detailed explanations of the errors, close the Metadata Validation window, and then continue to the next step.
The error levels that can appear during the import process are shown in the table below.
| Error Level | Description |
| Critical (red) |
|
| High (orange) | This error level applies to a piece of document metadata that cannot be imported as it is but that will not cause the import of the rest of the metadata for the document to fail. The piece of defective metadata will either be ignored or replaced with a valid value. |
| Medium (yellow) |
|
In addition to errors, the results you see after clicking Verify Metadata File may include a number for Documents without Metadata. This means that one or more documents were uploaded that have no corresponding row of information in the uploaded metadata spreadsheet.
- In the metadata spreadsheet you just opened, click Enable Editing.
- Look in the Field column (column A) for any cells with a fill color (red, orange, or yellow), which indicates that there is an error with the document metadata on that row. Look in that row for other colored cells, and then point to a colored cell to display the error detail.
Important: Be sure to scan the entire row for colored cells as there may be multiple errors for the same document.

- Open the original metadata spreadsheet you prepared and uploaded, and then make the needed changes.
- Repeat the steps in the "Uploading the Metadata Spreadsheet" section above.
Once the uploaded metadata spreadsheet validates with no errors (or with only high and medium errors that you chose not correct), you can start the document and metadata import.
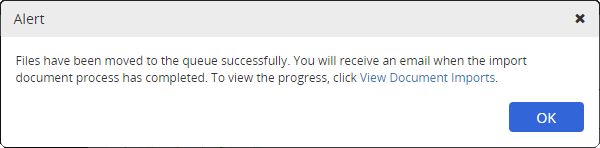
- Click Start Import.
- When an alert message displays, do one of the following:
- Click View Document imports, and select an import name to view the status.
- Click View Document Imports, select an import name, click Cancel Import, and then click Yes.
- Click OK.
This publication was written and produced at NAVEX Global, Inc., Lake Oswego, Oregon. This publication or any portion thereof is confidential and/or proprietary and may not be reproduced or used in any manner whatsoever without the express written permission of NAVEX Global, Inc.
Copyright © 2026 NAVEX Global, Inc. NAVEX Global® is a registered trademark/service mark of NAVEX Global, Inc. The NAVEX Global® logo is a trademark/service mark of NAVEX Global, Inc. Unauthorized use of NAVEX Global, Inc.’s trademarks/service marks is strictly prohibited without prior written permission from NAVEX Global, Inc.